Erik Leonard has been a proud Binghamton homeowner for a couple of years now, and in that time has substantially remodeled many different portions of his house. One recent project of his was reworking the closet in his bedroom, which was large but not easily accessible and had a lot of unusable space. Erik wanted to make better use of this space within a reasonable budget, and as a Maker decided that he would try to make his own built-in closet organizer based on his specific needs and preferences.

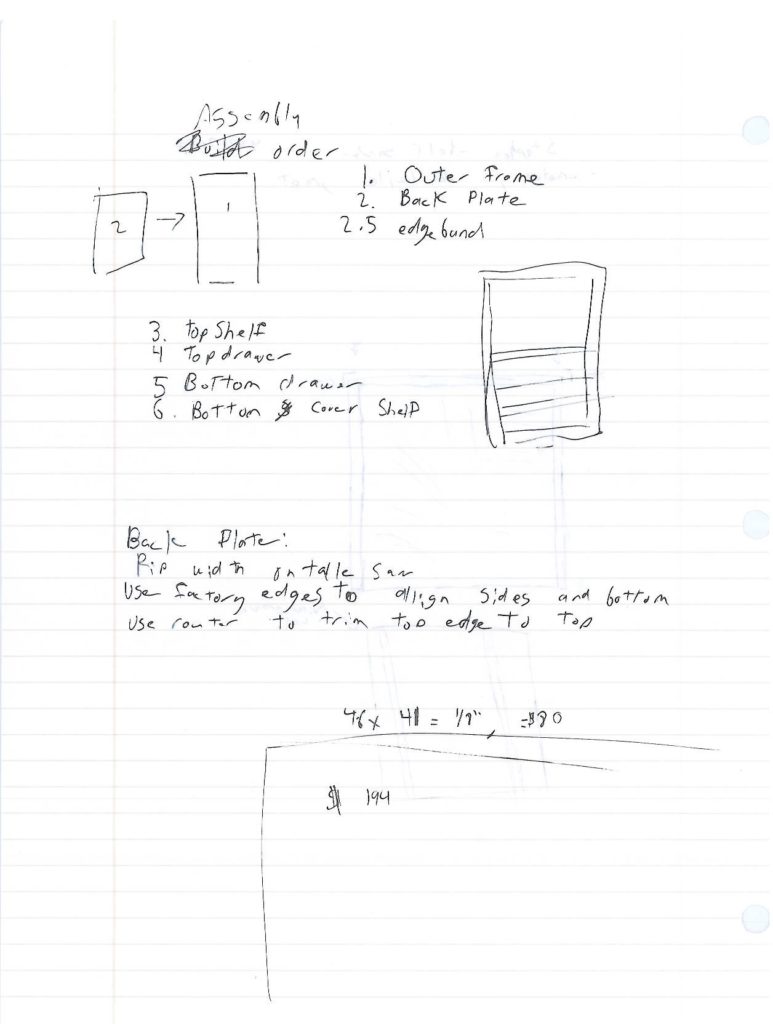
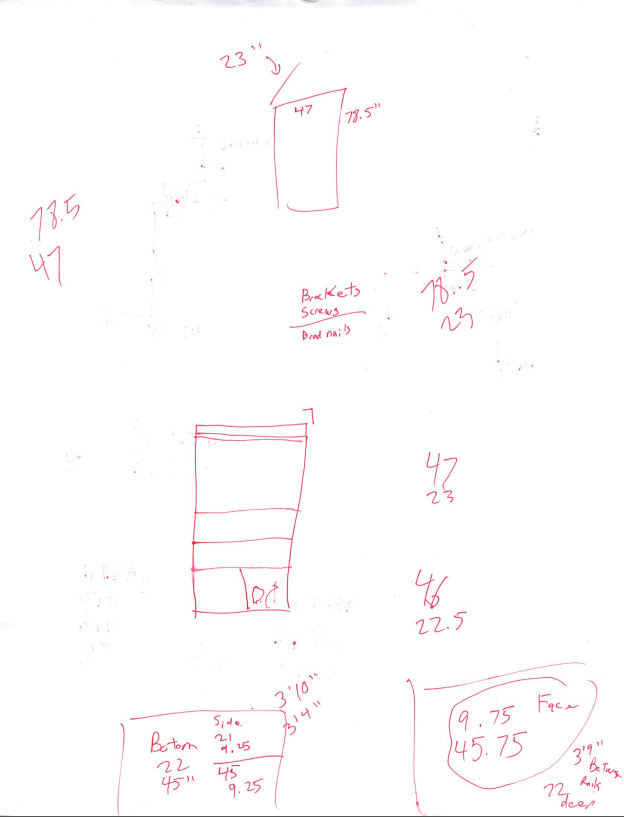
Erik started this project by drawing up some rough sketches of what he wanted in terms of clothing organizational concepts, then refined his initial ideas and sketches using the dimensions of the existing closet which the cabinet would be installed into. Specifically, he took the existing closet clothing rod as the highest dimension for any clothing inside the cabinet, then measured the length of his suit and added 3″ for clearance below the suit to get a vertical dimension for the portion of the cabinetry where clothing would be hung. He also decided to make this and all other portions of the cabinet take up the full width of one of the existing closet doors, to make the best use of the space available to him.
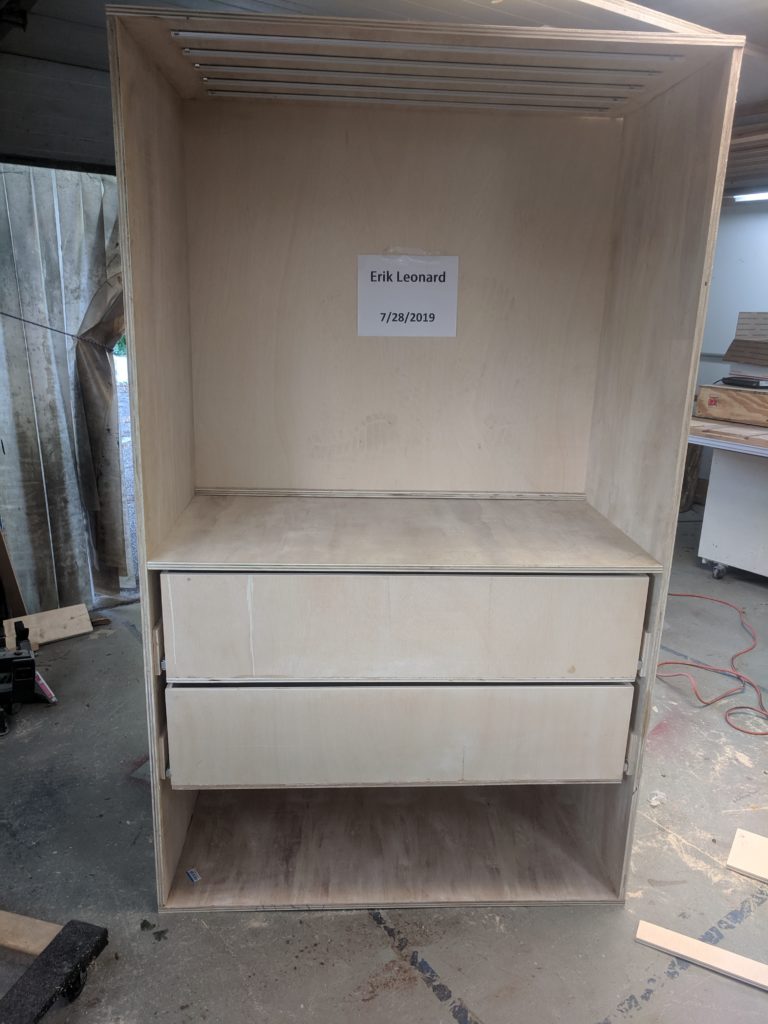
Next, he set the bottom of the cabinet on the floor, then measured a foot plus an inch vertically to create an open space for using IKEA clothing organizer cubes, which measure approximately 12″ in all dimensions. Finally, he took the remaining vertical space within the cabinet, divided it in two, and called the resulting dimension the height of each of the two drawers to be created and installed between the two open spaces in the cabinet. The screenshots below illustrate this design process, which culminated in detailed SketchUp designs used during the process of cabinet construction:
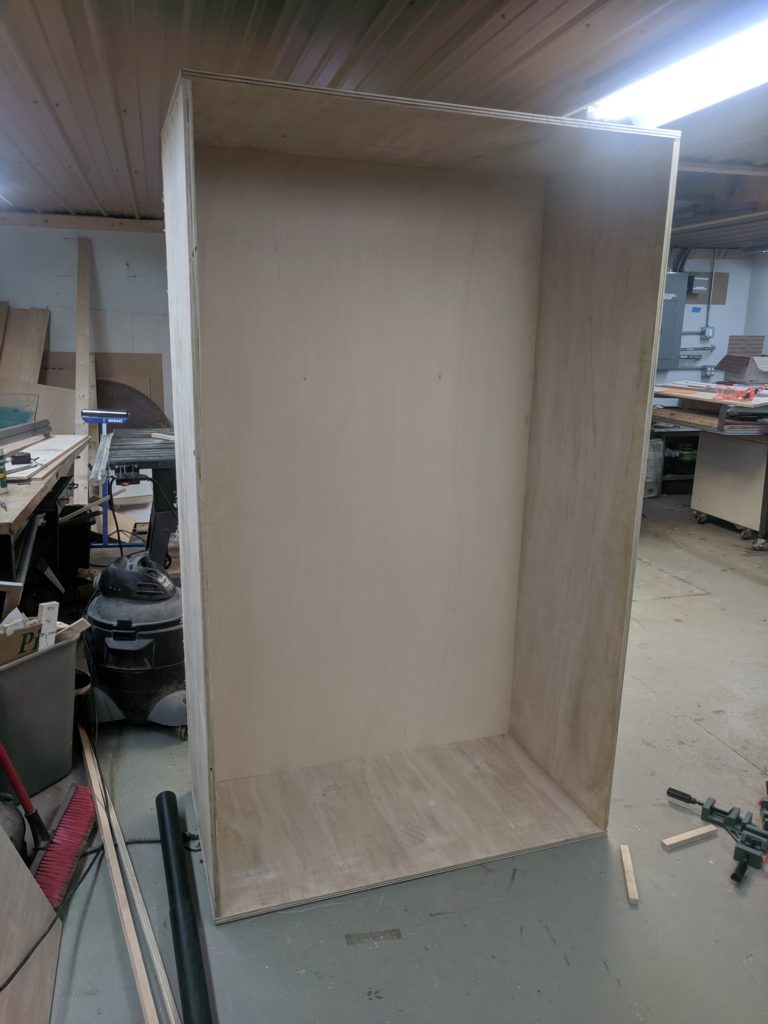
Once the design of the cabinet had been finalized, Erik created a list of materials and set about shopping for them. Most of the cabinet is constructed of 12 or 18mm sande plywood, which is extremely dimensionally accurate and strong but cannot be stained, as it contains divots filled in with wood putty; as Erik intended to paint the cabinet once constructed, this was not a problem for him. He specified 18mm plywood for the cabinet’s perimeter surfaces and internal dividers, and 12mm plywood for the cabinet back and drawers; all seams were connected using wood glue and/or standard wood screws using pocket hole joinery. All remaining components were sourced from the Home Depot (full-extension drawer slides, rated for 250 lb.), IKEA (the drawer pulls), Amazon (RGB LED strips to illuminate the cabinet interior), and AliBaba (an LED controller for the LED strips).
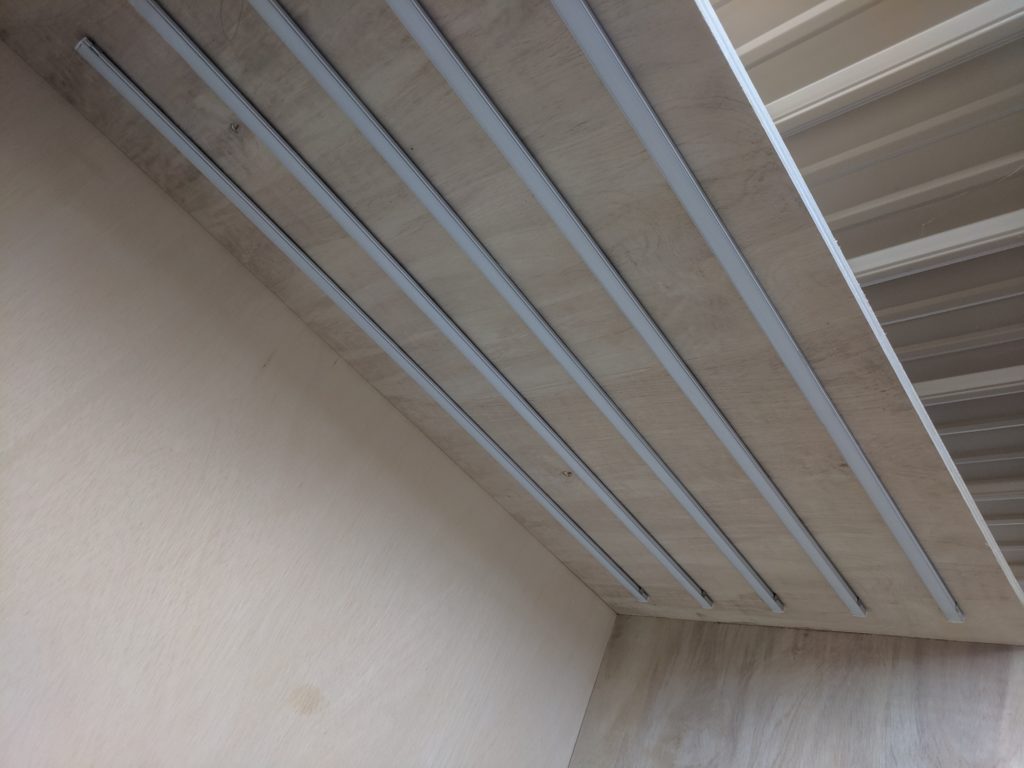
Once all of the cabinet components had been purchased and transported to the TCMS wood shop, Erik set about assembling the cabinet, using various YouTube tutorials and woodworking blog posts for information and ideas regarding cabinet assembly. He devoted a great deal of time and attention to making each of the plywood pieces cut to accurate dimensions per his design, which made the cabinet assembly process much easier. One design change made in the process was changing the LED strips’ mounting method from routing them into the top of the cabinet – which proved to be extremely time-consuming and difficult – to making use of extruded aluminum LED strip holders, which have built-in light diffusers and easily clip together around the LED strips before themselves being screwed to the top of the cabinet, as shown in the second and third screenshots below.
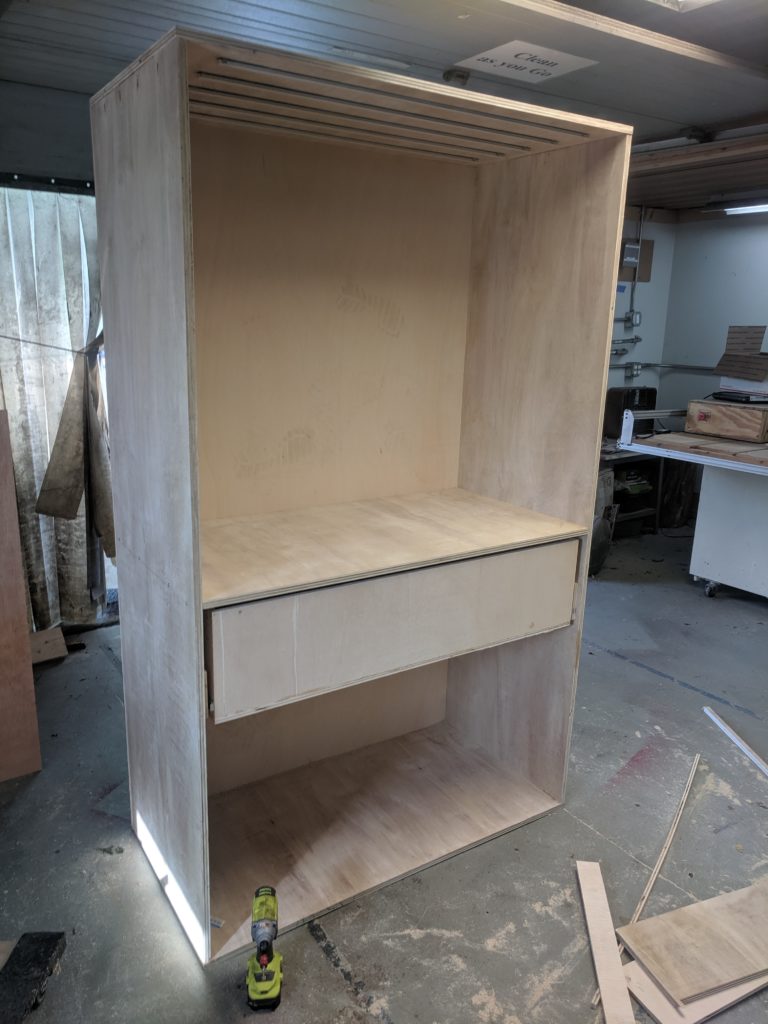
Creating and installing the drawers with their fascias proved to be one of the most time-consuming portions of the project, for the sake of making sure that the drawers consistently opened and closed smoothly and because of Erik’s desire to hide all of the fascia fasteners where possible. Once these were finally assembled and fitted, the drawers were temporarily removed from the cabinet, and everything was painted with multiple coats of a white, semi-gloss urethane alkyd enamel.
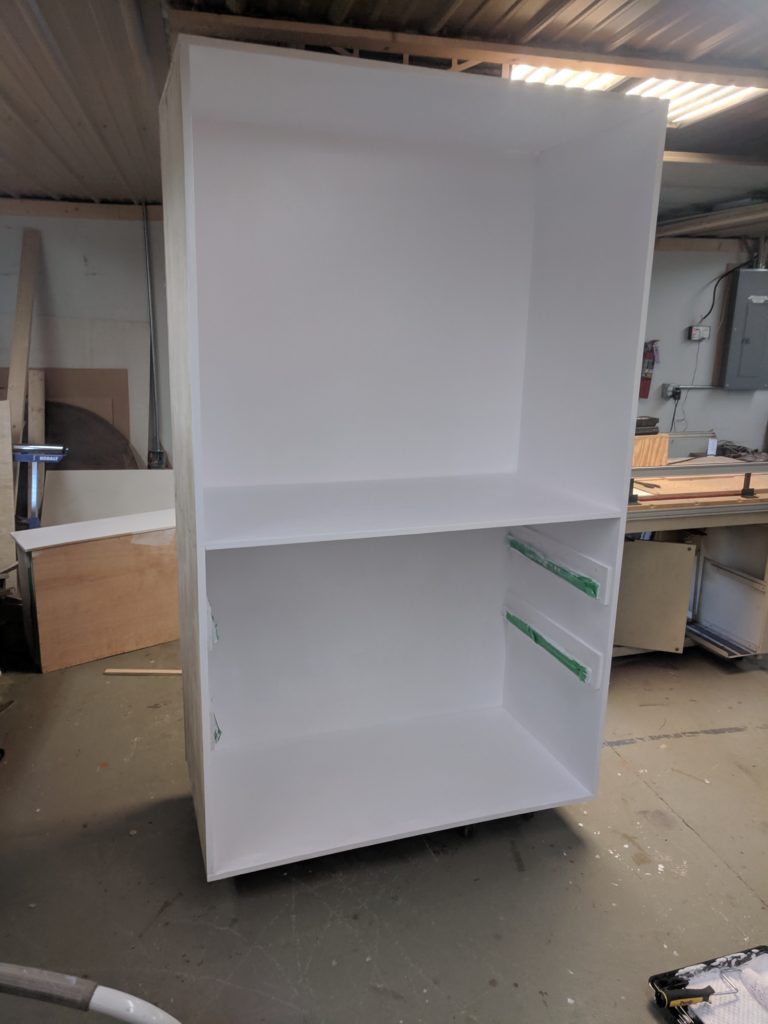
Once the paint had dried and the drawers re-installed, Erik enlisted the help of TCMS secretary Stephen Welte to help him transport the cabinet home and into his house. Once this was done, Erik was able to install the cabinet into his closet after temporarily removing some trim pieces around the closet for greater clearance, and screwed the cabinet into the closet structure with several screws which he subsequently concealed behind the cabinet’s drawers or with wood putty (sanded and re-painted afterwards). The LED strips, whose wiring had been concealed in a channel within the top of the cabinet, were connected to their controller (located on top of the cabinet), and the controller in turn plugged into an existing outlet within the closet.
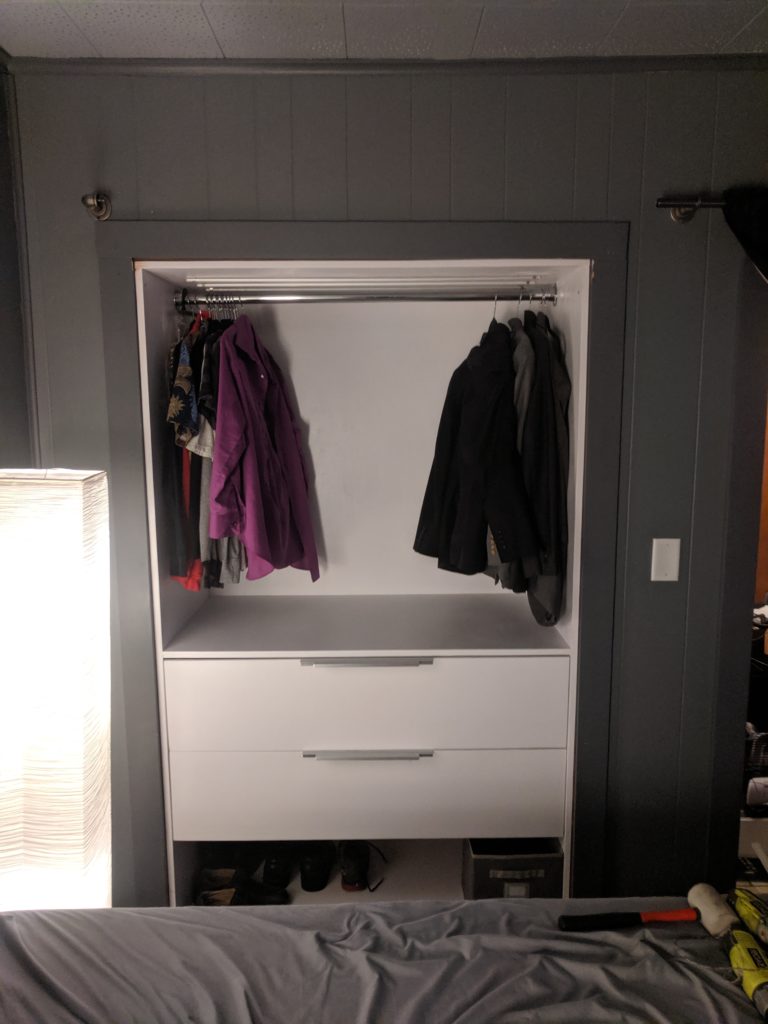
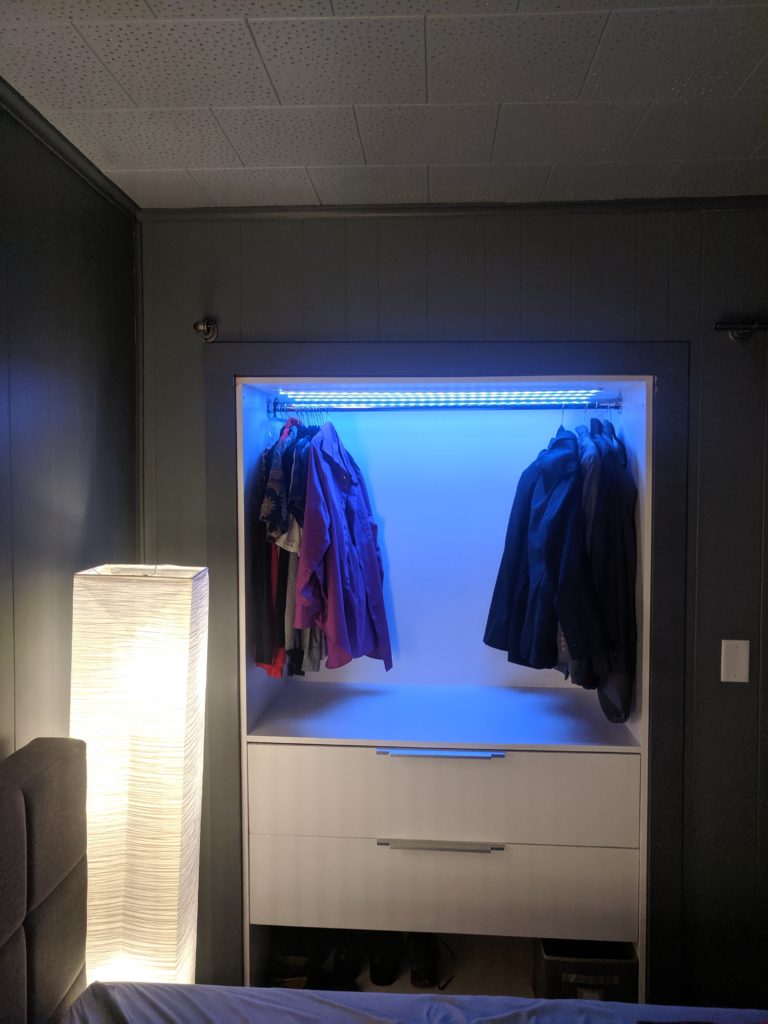
Erik is very happy with the final results of this project, and plans to eventually create another such cabinet for the other half of his closet to make better use of the space there!
All drawings, designs, and photos courtesy of and property of Erik Leonard. Wikipedia cited for page describing the concept and methods of pocket-hole joinery for woodworking projects.