What can you do with it?
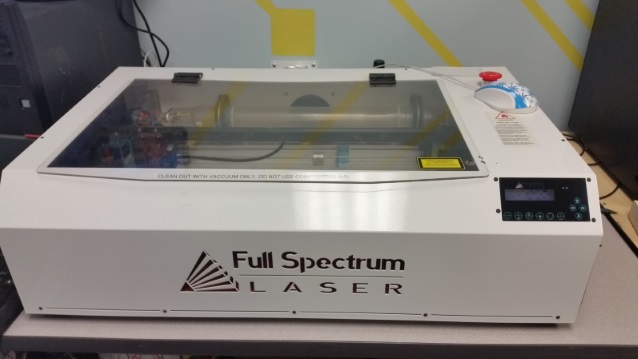
This 40W CO2 laser cutter makes very precise cuts and engravings with the power of lasers. It can cut materials up to 20″ x 12″.
Use it to cut or engrave most non-metallic materials. Metal can also be marked if it is color anodized or if it is first coated with Thermark.
Your design can be made with software such as Inkscape and then sent to the cutter. You can specify the depth of the cut by adjusting the laser strength and number of passes. It will do the rest!
For full specifications, please see the Full Spectrum product page.
Members are required to take a short training class on proper usage and safety before using this tool.
Using the FSL Laser:
Materials:
Please consult the material safety list above the laser before cutting a new material. Most materials are laser safe, but some will emit gasses that can damager the laser optics, others can emit gasses like cyanide that are deadly.
Focusing.
To ensure a proper cut the laser must be focused every time before usage. To focus the laser use the aluminum focusing block.
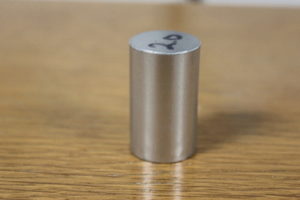
Start by turning the thumbscrew on the focusing mechanism counter clockwise, raise the head all the way, tighten the thumbscrew, then jog over the item you’re going to cut then. Place the focusing block under the focusing mechanism.. Move the laser head over the block, lower the focusing lens until it just touches the block, then tighten the screw and remove the block.

Turning the laser on:
To turn the laser on, flip the switch on the wall above the laser, this will turn on the laser cutter, the coolant pump, the air assist, and the fume extractor.
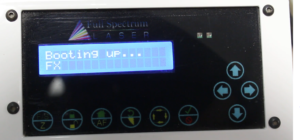
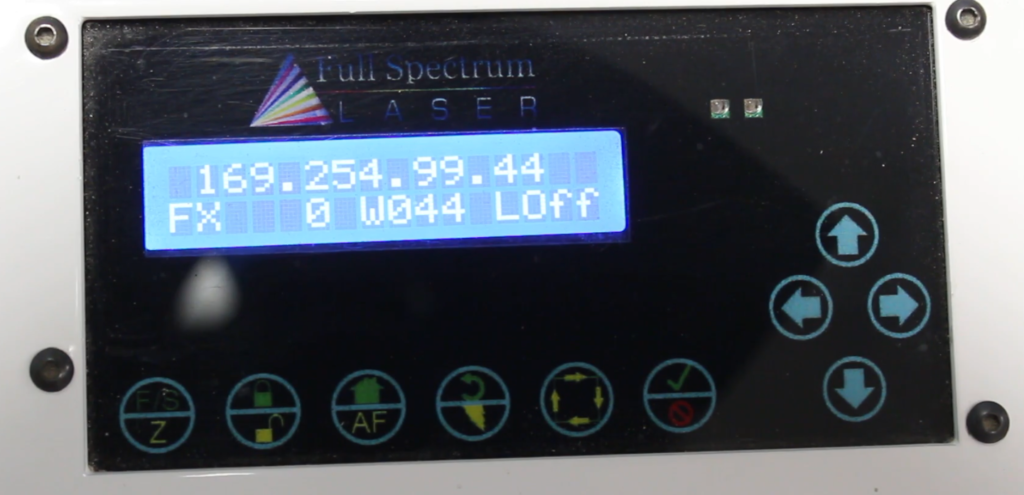
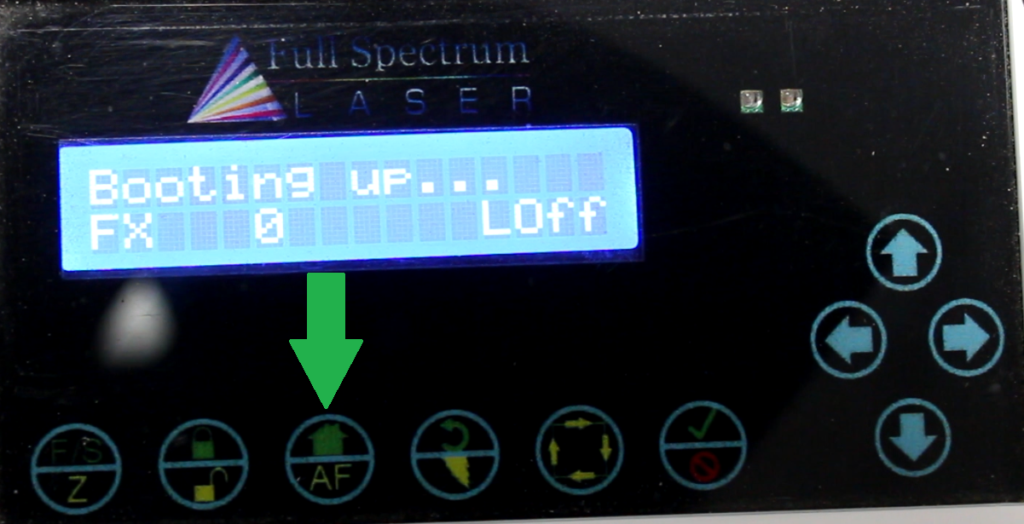
The controller in the laser cutter will take several seconds to start up, you’ll know it’s done when the screen on the front of the laser shows the IP address of the laser
Homing:
Before you can start cutting or engraving you must home the laser head, so that it knows its start position. You can home the laser by pressing the H key on the keyboard, pressing the house icon in Retina Engrave:

or by pressing the Home icon on the control panel.
The lasers home position is in the back right corner.
Positioning:
Unlike a 3D printer the laser cutter has no sense of it’s build envelope. IE you can’t place a digital design file on the build platform and have the laser move to the start position of the piece. Instead to position your job you must jog the laser head over your piece. Where you move the head to is where the job will start. To get a sense of the size and position of the job before you run it the permitereing option can be used. This option will move the laser head from the upper left, to upper right, to lower right, to lower left and back to the upper left along the outline of the job. A perimeter is run by pressing the P key on the keyboard, press P each time to move through the four positions.

Note that since the laser doesn’t know where you want to start you must return to the upper left position on the perimeter or else the laser will assume that where you left the head is where you want the job to start.
In case of an issue:
If something goes wrong with the laser you have four ways to stop it, depending on the severity. In a situation where something is very wrong or you need to stop the motion and laser immediately you can press the estop. This will kill all power to the laser cutter.
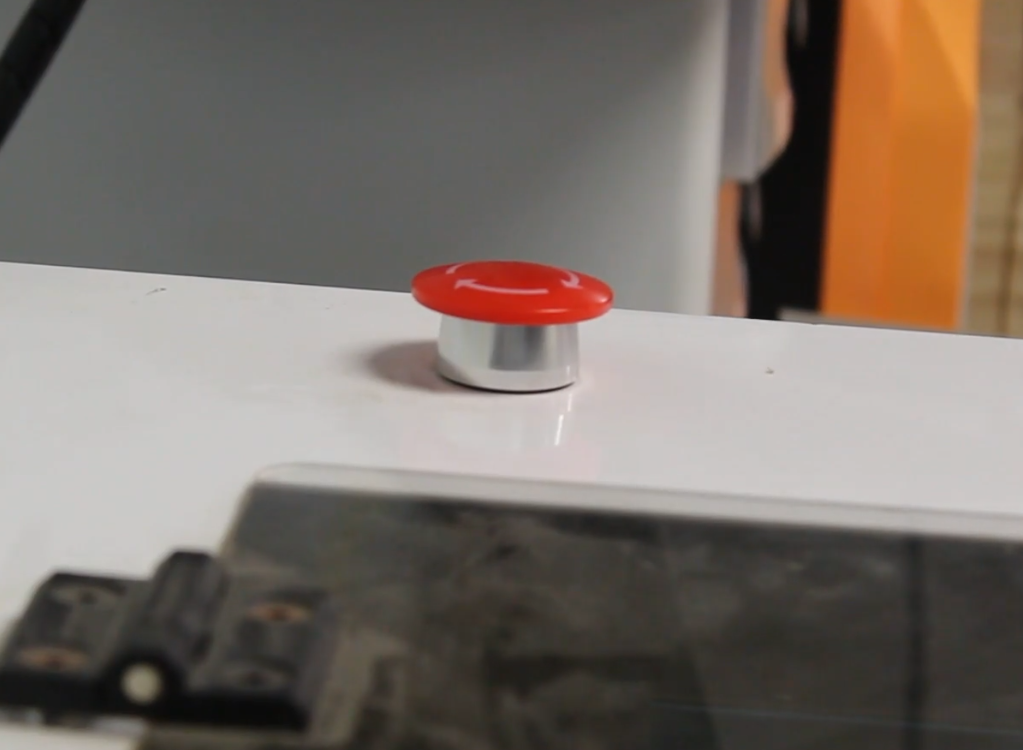
To turn the laser back on after pressing the estop twist the red top to release the estop:

If your issue is less drastic, IE the laser is cutting an area that you don’t want it to cut, you can lift the lid. This will trip the lid interlock switch and turn off power to the laser, it will not stop the laser head from moving though. This can be useful when you don’t want to mess up the positioning of your job, as pressing the estop will completely turn the laser off which means you will need to rehome the laser.
You can also stop a job with the Stop or Pause buttons in Retina Create.
The laser will continue to run whatever commands are left in the buffer and may not stop immediately.
Retina Engrave:
Retina Engrave is the software used to set up jobs and control the laser cutter.
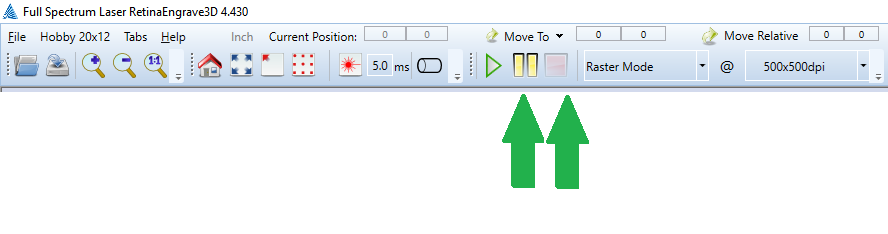
The top bar has the normal Windows style File menus, etc.
Below that are buttons to control different aspects of the laser. The play pause and stop buttons are used to start stop and suspend laser operations.

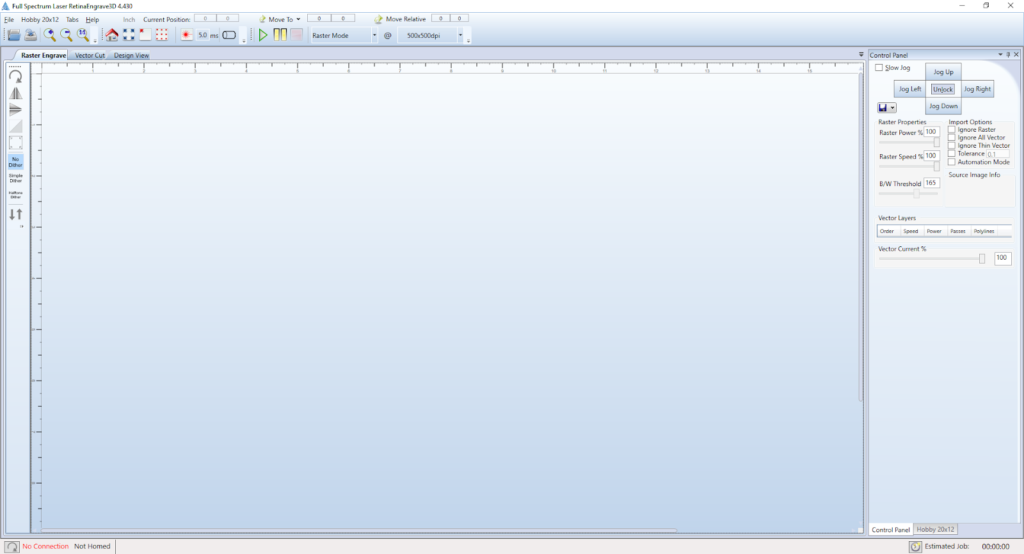
Below the top bar are three tabs that allow you to enter raster, vector, or design view:
![]()
Down the side there are buttons that allow for basic image manipulation, including rotating scaling, inverting colors,

To the right there is a control panel window that lets you control the laser power and speed settings. This window also allows you to jog the laser head with buttons or by clicking the jog directional menu buttons.
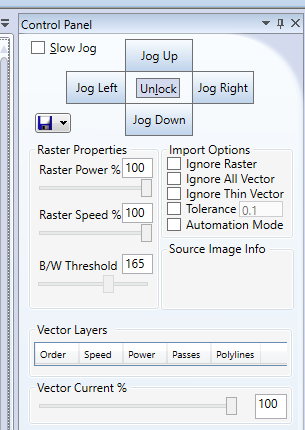
Note that the raster section has power and speed settings and then at the bottom vector also has power and speed settings. If you adjust the vector speed and power while in a raster job nothing will happen and vice versa.
Raster VS Vector:
As shown above the two modes of using the laser are vector and raster. This begs the questions, what’s the difference between a vector and a raster image? Raster images are based on bitmap technology, bitmaps are, as the name implies a map of bits, but what does that mean practically? Imagine if you took a photo of something, then laid a piece of graph paper over it and in each cell of the graph paper you shaded in with the appropriate color from the photo. If the cells were small enough you’d end up with a representation of the image you started with, but at a microscopic level you’d really only have a gird full of colored cells, this is essentially what a bitmap is. Examples of bitmaps include digital photographs, screenshots, etc.
Raster images on the other hand use mathematical expressions to represent an image. Imagine if you had a drawing of a building, but instead of tracing it with graph paper like we did for the photo in the bitmap example you instead described the lines in relation to each other. The bottom of the building might have a line that runs horizontal for 12 units, then it turns 90 degrees up and goes for 5 units, then it splits and each end goes at 45 degrees for 10 units. Now, why would we want to do this? Scalability. If you take your graph paper image and blew it up from 8.5 by 11 (standard copy paper size) to the size of a billboard the cells of your image would be huge and the image would look grainy (replace the cells with pixels and the grain with pixelation and that’s a bitmap). Everyone has seen this in real life, whether it’s a desktop wallpaper that looks like crap when blow up, or trying to zoom too far into an image and getting no more detail but just a blocky mess. Now what if we tried to do the same thing with our vector image? Let’s say we wanted to make it 5 times bigger, so the bottom line now goes 60 units, turns 90 degrees, goes up for 25 units, etc. Since we used math to express it it’s infinitely scalable.
So why does this matter for the laser cutter? Well if you give the laser a raster image it can read the lines as commands of where to move, you have a straight line in your vector image, ok cool, the laser knows how to move it’s cut head in a straight line, got a circle? The laser knows how to make a circle. With raster you’re giving it a map of points, so the best the laser can do is read each line of pixels and either pulse the laser on or off, since it doesn’t know what the picture is, it just knows the data in the image.
Raster Mode:
Raster mode allows you to input a .bmp bitmap file and the laser will engrave it into material.
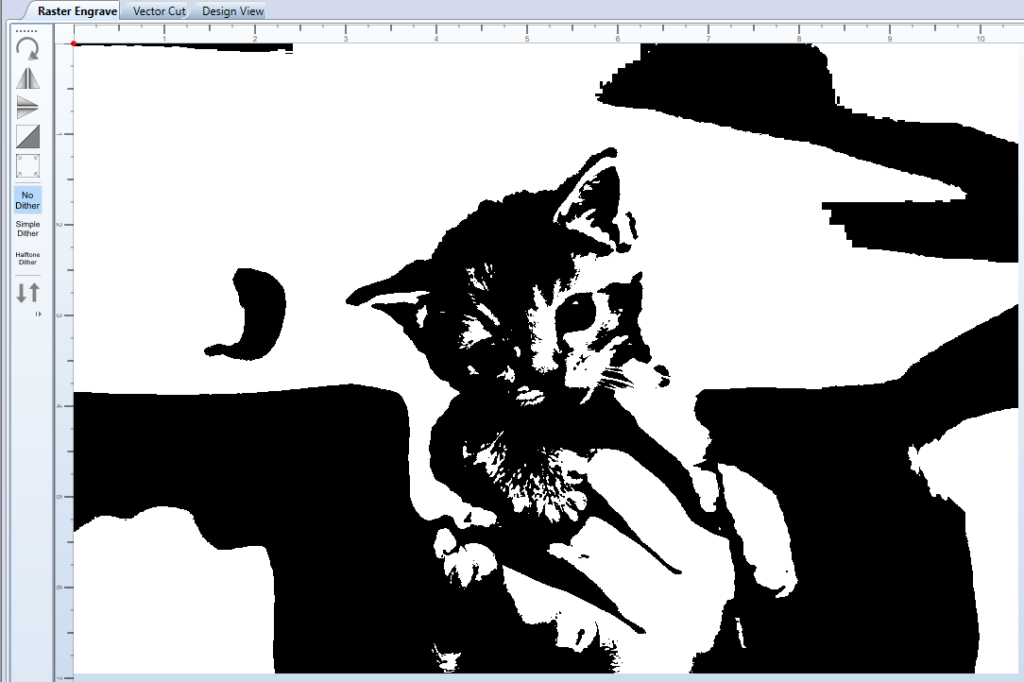
Since the laser can’t burn in color it turns all images into black and white. You can adjust how it represents the colors as black or white by sliding the B/W threshold slider:
Source image:


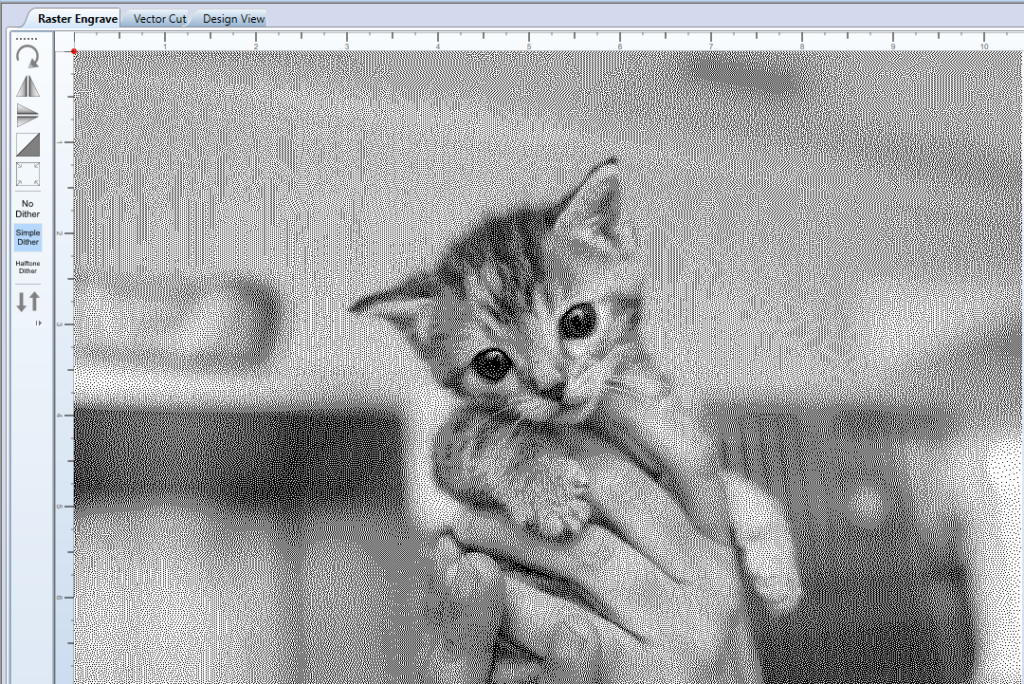
The other option you can use, is faux grayscale by enabling Dither. Dither uses closely spaced dots of black to represent shades and gives you more detail at the sacrifice of contrast.
No dither:
Dither:
Vector:
Vector mode is typically used for cutting operations, as the software will ignore any fill colors and only deal with lines. This mode allows you to load .xps files. A note on XPS files, xps is a file format that Microsoft started using back in Windows XP, every OS since then has included an XPS printer as a virtual device, so in your vector design tool of choice you can simply choose, File>Print>XPS Printer and that will save your file as an .xps. Now if you’re thinking to yourself well, couldn’t I just take a raster image and print is an XPS? Why yes you can! Will the laser read that? Absolutely not! Also if you are on Mac, Linux, Unix, ChromeOS, etc you’re pretty much out of luck, you’ll need to save your file in a vector format, then open it on a Windows PC and print as XPS.
How to make a vector file is beyond the scope of this training but I will touch on it briefly. Inkscape is the preferred tool for working with vector files, it’s fast, it’s free, it’s open source and it works on Mac, PC, and Linux.
Here you can see how a vector file looks when loaded in Retina Engrave:
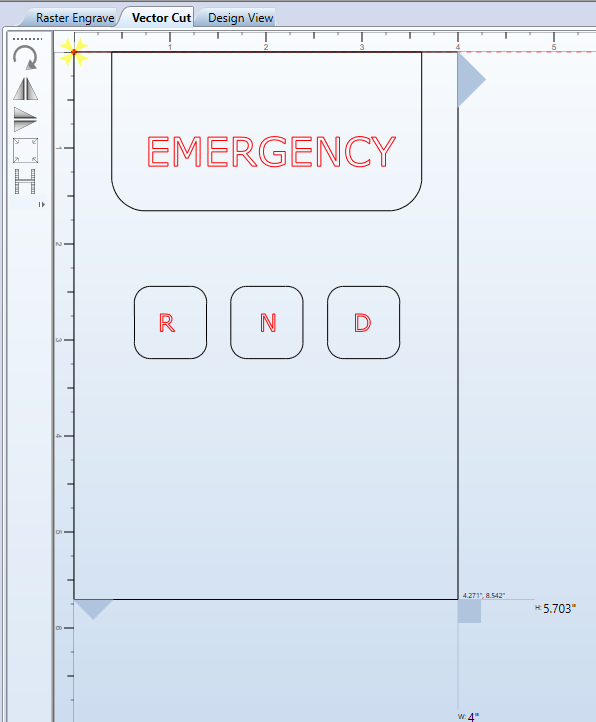
Retina will automatically detect primary colors and break them out into different paths.
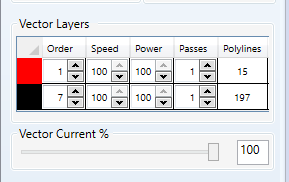
The different colors allow you to set different speed and power passes. This can be useful if you want to cut, vs etch. In the example file you can see that we want to cut out the R N D buttons, but we want the buttons to be etched, so we could set a faster or less powerful pass for those items to achieve that effect. You can also see there is an order option, this allow you to choose what order the laser will cut parts in. For example it’s better to have the laser etch the text into our buttons before we cut them free of the material.
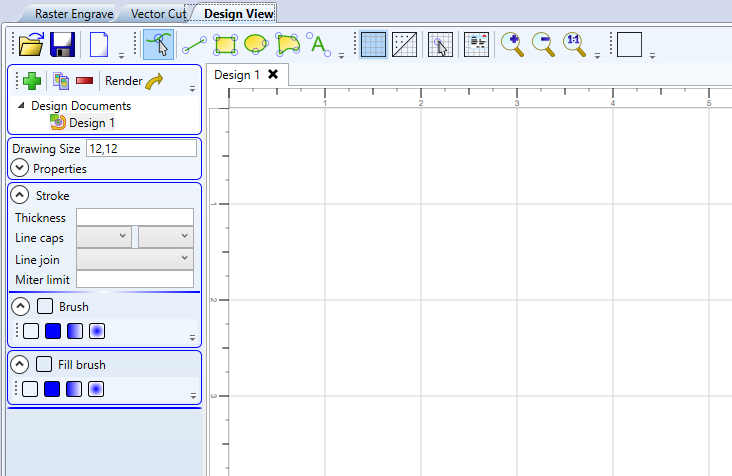
Design view.
Design view allows you to do some basic shape and text creation, then you can click Render and it will load it into the raster page. That’s all I’ll say about this page, it’s poorly written, difficult to use, and not worth your time.
Speed and power:
When using the laser you will have the ability to choose speeds, power and passes. As a rule of thumb we recommend that you use 80% or less power as this greatly extends the lifetime of the laser tube, which is a $1,000+ item. It’s preferred to use a couple passes at a lower power than one at a higher power setting.
To determine the speed and power settings for your materials please consult the sample items in the drawer next to the laser, these items have speed and power settings etched into them to give you an idea of what to set your parameters to.